A reliable water heater is essential for providing hot water for showers, dishwashing, laundry, and everyday household tasks. Whether you’re installing a new unit or replacing an old, inefficient one, understanding the process can help ensure a smooth and safe water heater installation. In this guide, we’ll walk you through the steps for installing and replacing a water heater, covering both gas and electric models.
Before You Begin: Preparing for Installation
Before installing or replacing a water heater, it’s important to take the following steps:
1. Choose the Right Water Heater
Water heaters come in different types and sizes. Select the right unit based on your household’s hot water needs, energy efficiency goals, and available space.
- Tank vs. Tankless Water Heater: Tank models store hot water, while tankless systems heat water on demand.
- Gas vs. Electric Water Heater: Gas models heat water faster and are often more energy-efficient, while electric models are easier to install and require no ventilation.
- Capacity: Common tank sizes range from 30 to 80 gallons. A household of 3 to 4 people typically needs a 40 to 50 gallon tank.
2. Gather the Necessary Tools and Materials
To install or replace a water heater, you’ll need the following:
- Pipe wrench
- Adjustable wrench
- Teflon tape
- Pipe cutter
- Bucket
- Screwdrivers
- Tubing cutter (for copper pipes)
- Soldering supplies (if needed)
- Gas line fittings (for gas water heaters)
- Electrical tools (for electric water heaters)
- Drain hose
- Safety gloves and goggles
3. Turn Off Power and Water Supply
- For Gas Water Heaters: Shut off the gas supply valve.
- For Electric Water Heaters: Turn off the power at the breaker box.
- For Both Models: Shut off the cold water supply to the water heater.
How to Remove the Old Water Heater
Before installing a new unit, the old water heater must be safely removed.
1. Drain the Tank
- Attach a garden hose to the drain valve at the bottom of the tank.
- Place the other end of the hose in a floor drain or outside to direct water away from your home.
- Open the drain valve and let the water completely empty from the tank.
2. Disconnect Water Supply Lines
- Use a wrench to disconnect the cold and hot water supply lines.
- If the pipes are soldered, use a tubing cutter to carefully cut them.
3. Disconnect the Power or Gas Supply
- For Electric Models: Disconnect the wiring from the unit.
- For Gas Models:
- Turn off the gas valve.
- Use a wrench to disconnect the gas line from the water heater.
- Cap the gas line to prevent leaks.
4. Remove the Old Unit
Once everything is disconnected, carefully lift and remove the old water heater. You may need assistance, as tanks can be heavy.
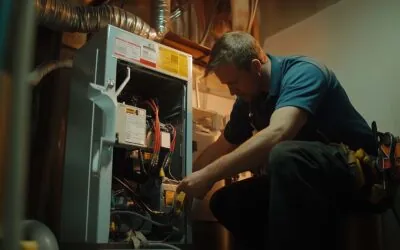
How to Install the New Water Heater
Now that the old unit is removed, follow these steps to install the new water heater.
1. Position the New Water Heater
Place the new unit in the designated area, ensuring it has proper clearance on all sides for ventilation and maintenance.
2. Connect the Water Supply Lines
- Wrap Teflon tape around the threads of the cold and hot water inlet/outlet pipes to prevent leaks.
- Connect the cold water supply line to the cold inlet and the hot water line to the hot outlet using flexible water connectors or soldering (if using copper pipes).
- Turn on the cold water supply to fill the tank and check for leaks.
3. Connect the Gas or Electrical Supply
- For Gas Models:
- Connect the gas line to the gas control valve.
- Apply gas-rated Teflon tape or pipe joint compound to ensure a secure, leak-free connection.
- Test for leaks by applying a soapy water solution to the gas fittings — if bubbles appear, tighten the connections.
- Open the gas valve and follow the manufacturer’s instructions to ignite the pilot light.
- For Electric Models:
- Connect the electrical wiring according to the unit’s specifications.
- Match the wire colors and use wire nuts to secure the connections.
- Turn the power back on at the breaker panel.
4. Adjust the Temperature and Pressure Relief Valve (TPR)
The Temperature and Pressure Relief (TPR) valve is a critical safety component that prevents pressure buildup.
- Attach a discharge pipe to the TPR valve.
- Position the pipe to direct excess water toward a drain or a safe area.
- Ensure the pipe is securely attached and has no bends that could restrict flow.
5. Fill the Tank and Check for Leaks
- Open a hot water faucet in your home to let air escape from the system.
- Slowly turn on the cold water supply to fill the tank.
- Check all connections for leaks.
6. Test the Water Heater
- For Gas Models: Light the pilot flame and adjust the thermostat to the recommended setting (typically 120°F).
- For Electric Models: After the tank is filled, turn on the power and allow the heater to warm the water.
Safety Tips and Final Checks
- Ventilation: Gas water heaters must have proper venting to expel combustion gases safely.
- Gas Leak Check: If you smell gas or suspect a leak, turn off the gas supply immediately and contact a professional.
- Water Pressure: Make sure the pressure relief valve is functioning properly to prevent pressure buildup.
- Monitor the System: Check for leaks and proper operation over the next few days.
When to Call a Professional
While installing a water heater can be a DIY project for those with plumbing experience, certain situations may require professional assistance:
- If your home has complex plumbing or electrical configurations.
- If you are unfamiliar with gas line safety.
- If local building codes require a licensed plumber for installation.
- If you are upgrading to a tankless or hybrid system.
Professional installation ensures your unit meets safety regulations and operates efficiently.
Ensure a Safe and Efficient Water Heater Installation
Replacing or installing a new water heater is a crucial home improvement task that ensures access to hot water for daily needs. By following the proper steps — selecting the right unit, safely removing the old one, and correctly installing the new heater — you can enjoy reliable hot water while optimizing efficiency.For homeowners who prefer expert guidance, Steel T Home Services is here to help. Our experienced technicians provide professional water heater installation and replacement services to ensure safety, efficiency, and compliance with all local codes. Contact us today for a consultation, and let us handle your water heating needs with precision and care!
Steel T Home Services is Denver's choice for HVAC, plumbing & electrical needs. With over 40 years of experience in serving our valued customers’ needs, Steel T is committed to providing unparalleled comfort to your home.